Autumn Supper
1/2/2021 | 24m 23sVideo has Closed Captions
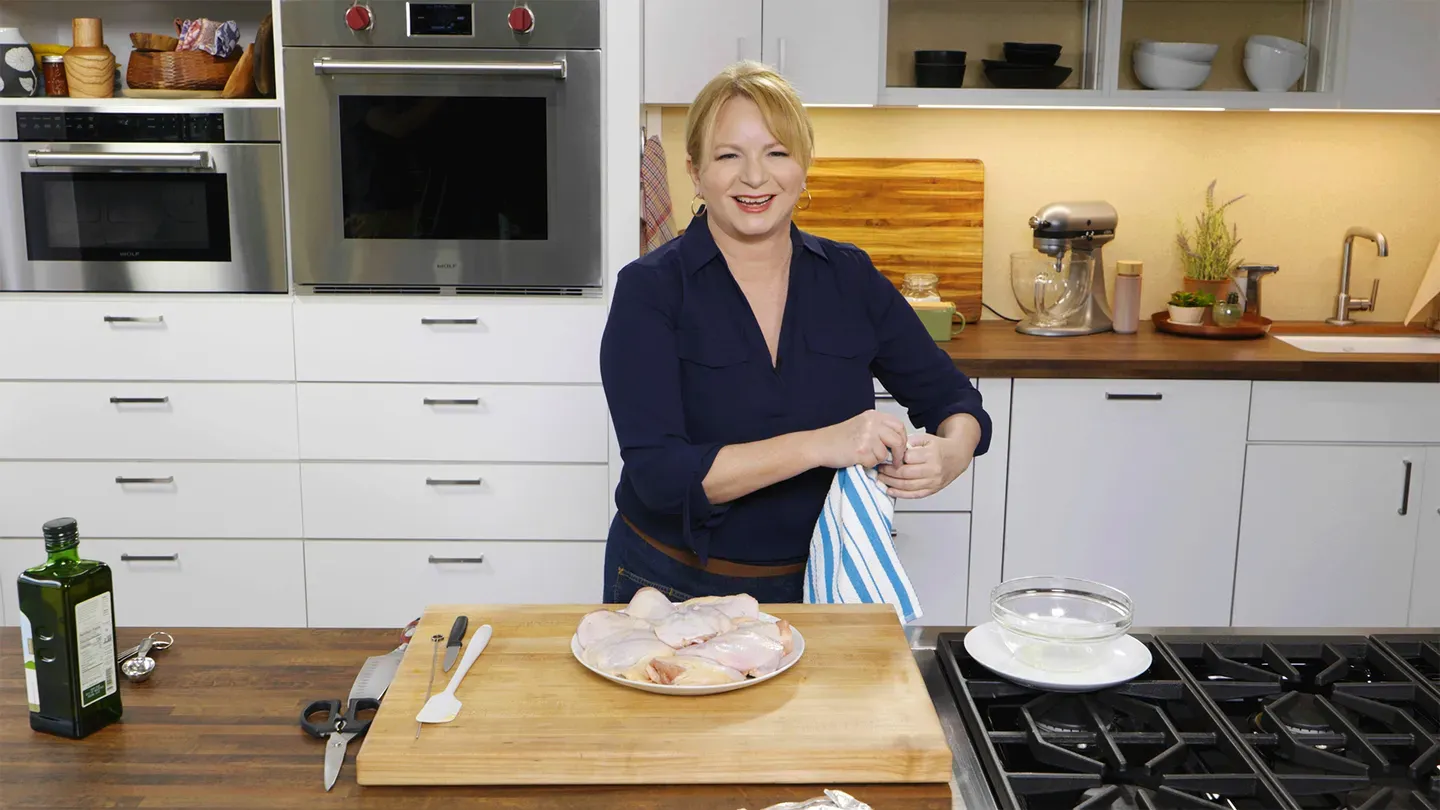
Host Bridget Lancaster prepares perfect Oven-Roasted Chicken Thighs.
Host Bridget Lancaster prepares perfect Oven-Roasted Chicken Thighs, equipment expert Adam Ried rounds up the best tools for roasting, and host Julia Collin Davison bakes the easiest-ever Apple Crumble.
Problems with Closed Captions? Closed Captioning Feedback
Problems with Closed Captions? Closed Captioning Feedback
America's Test Kitchen is presented by your local public television station.
Distributed nationally by American Public Television
Autumn Supper
1/2/2021 | 24m 23sVideo has Closed Captions
Host Bridget Lancaster prepares perfect Oven-Roasted Chicken Thighs, equipment expert Adam Ried rounds up the best tools for roasting, and host Julia Collin Davison bakes the easiest-ever Apple Crumble.
Problems with Closed Captions? Closed Captioning Feedback
How to Watch America's Test Kitchen
America's Test Kitchen is available to stream on pbs.org and the free PBS App, available on iPhone, Apple TV, Android TV, Android smartphones, Amazon Fire TV, Amazon Fire Tablet, Roku, Samsung Smart TV, and Vizio.
Providing Support for PBS.org
Learn Moreabout PBS online sponsorship♪♪ ♪♪ ♪♪ ♪♪ ♪♪ -Welcome to "America's Test Kitchen" at home.
Today I'm making oven-roasted chicken thighs, Adam's got a roundup of roasting tools, and Julia's making the easiest-ever apple crumble.
We've got so much in store for you today, so stick around.
♪♪ -Chicken thighs are definitely one of the most underappreciated parts of the chicken, but they're so full of flavor.
I put them right up there with chicken wings as my favorite part of the chicken.
And that's what we're making today -- and a whole bunch of them.
This is family style.
So I need to find a way to cook these fast.
Enter the rimmed baking sheet.
I'm going to preheat this pan.
All the chicken goes on at once.
Very easy method.
So I'm going to put this in a cold oven and then set the oven to 450 degrees.
Alright.
Next up, we're making a salsa verde.
That beautiful Italian garlic and parsley sauce.
We're going to roast some garlic.
So I've got a whole head here, and I just want to take off the outer, papery skin, and I'll separate all these cloves inside.
Again, these are unpeeled, obviously.
I'm going to add a little bit of extra-virgin olive oil -- about a tablespoon.
Let me toss these.
And now, I mentioned this is going to be a roasted garlic salsa verde.
We're not going to roast these right in the oven the whole time.
We're gonna speed things up by using the microwave.
I'm gonna put a microwave-safe plate right on top, put this in the microwave, and cook it between two to five minutes until the cloves are nice and tender.
Alright.
These have a little bit of time left.
But I am going to go ahead and stir this halfway through just to make sure that they're cooking evenly.
Oh!
Kitchen filled with the smell of garlic.
Plate goes back on, and it probably needs another two minutes.
[ Sniffs ] The smell in here right now is amazing.
Oh.
Alright.
So let's take a look at the garlic and see if it's nice and tender.
Just using a paring knife here.
You can see it's incredibly tender.
So we're done with the microwave.
It gave us a little bit of a head start.
We're gonna finish roasting these in the oven.
So I've got two sheets of aluminum foil about 12 inches in width.
Alright.
And I will pour this garlic.
Oh.
Amazing.
Just right into the center.
That little bit of oil there, too.
Top with another piece of foil, and then I'm going to start to kind of fold this up into about a seven-inch packet.
Alright.
That looks great.
I'm gonna set that aside for just a minute.
As I mentioned before, we're making quite a bit.
These are eight chicken thighs.
Each of them weighs about 6 to 8 ounces.
And that's important, because we want these to cook all at the same rate.
So we just need to do a couple of things to the chicken.
For one thing, I want to make sure that they are well trimmed because any extra skin or extra fat is just not a good situation.
A couple different ways that you can trim chicken thighs.
You can use a chef's knife, which I'll do as well.
But I also like to use a pair of kitchen shears to just get rid of the skin.
And it's also a great way of kind of getting around this little flabby fat that's on the outside.
But you don't need to go too crazy here.
Whatever's easiest.
Now, chicken thighs are beautiful, especially when that skin is rendered and crisp.
But right underneath that skin is a layer of fat, and it can be hard for it to render out.
So I'm going to take a metal skewer.
You can also use a paring knife if you want.
I'm going to poke each of these about 10 times.
Poking these holes in the chicken really helps.
It creates these little channels that the fat can render out of.
Okay.
Let's season the chicken.
I've got 1 1/4 teaspoons of table salt in here.
You can also use kosher salt.
You would want to use roughly double the amount.
And hit it with some pepper.
Pepper to taste.
Now, whenever I'm working with raw meat, I always like to portion out the salt and pepper separately instead of getting it out of a big salt box.
That way, you don't contaminate everything else.
And let me flip these over.
More salt...and more pepper.
And for luck.
Alright.
One more thing to do before I go get that super-hot sheet pan.
I'm gonna spray them with a little bit of vegetable oil cooking spray, and that's going to help prevent them from sticking to that pan but also help promote a really crisp crust.
So let's go get that sheet pan.
Super hot.
And I want to remind myself not to grab it, so I'm going to put this towel right on the corner here.
Put these thighs right on that sheet pan, but skin side down, and we should hear a good sizzle.
[ Sizzling ] Just like that.
And that's what I meant by this acting basically like a big old skillet.
Alright.
And I don't want to forget that packet of garlic.
I'm just gonna throw this right on there for a second while we move back to the oven.
Alright.
Now, before I put the chicken on the lower rack, I'm gonna go ahead and put this packet of garlic on the top rack.
And we'll cook this until the thighs register about 160 degrees.
That's gonna take between 20 to 25 minutes.
But after 10 minutes, I'm gonna go in there and get the garlic.
♪♪ It's been about 10 minutes, so I'm gonna go ahead and rotate the chicken just so that it cooks more evenly.
There we go.
That probably has another good 10 to 15 minutes left.
But while I'm here, I might as well grab the garlic.
It only needed 10 minutes of cooking time.
Ooh.
Alright.
Smells great.
But I want to cool down this garlic, so I'm just gonna make a slit in here and just open that a little bit.
I'm gonna let that cool off while we work on the rest of our salsa verde.
Now, of course, salsa verde -- main component is parsley.
Now, I like to store our parsley in a little jug of water 'cause it reminds me, A, that my husband never sends me flowers and this will have to do, but also it's just going to keep the herbs nice and lively.
I could pick off these one at a time, and that is fine if you want to do that too, but I like to start shaving the leaves off.
I need about a cup.
And then if I see any big stems in there, I'll just get rid of that.
Now, this I will throw in the freezer.
This is great for stock, all these parsley stems.
Amazing flavor.
Alright.
And I just need to do a little bit of picking here.
Not too bad.
That looks great.
So now I'll put the parsley into the food processor.
And our next ingredient is fresh lemon.
We need about 2 tablespoons of lemon juice.
Cut it in half.
And for big lemons like this, especially if I'm using a citrus press, I like to quarter them.
You can get a lot more juice out that way.
So 2 tablespoons of fresh lemon juice.
Next up -- and this is really what makes it an Italian salsa verde -- is capers and anchovies.
I've got 2 tablespoons of capers, which I've rinsed.
And while I was at the sink, I went ahead and rinsed two anchovy fillets as well, patted them dry, and these can go right into the food processor.
Some salt -- 1/4 teaspoon.
This is table salt.
So at this point, the garlic cooled off just enough so that I can handle them.
We're gonna squeeze these right into our food processor.
That caramelization -- that is some great flavor just for being in the oven for 10 minutes.
I mean, look how deeply colored that is.
That is gorgeous.
Alright.
So I'm gonna pulse this for about five seconds, until the parsley and the garlic are broken down.
Alright.
So I do want to get in there, just start scraping down the sides a little bit here.
But now that the parsley is pretty broken down, we can add our other ingredients.
I've got 1/4 teaspoon of red pepper flakes and 1/4 cup of extra-virgin olive oil.
Something that's fruity is perfect for this job.
Just 1/4 cup.
I'll add that in.
And I'm just gonna pulse this until the parsley is broken down a little bit more and it's all mixed.
I don't want to overprocess this at this point, because now I've added the olive oil, and if you overprocess olive oil, it can start to taste a little bitter.
I'll give it a few pulses.
Oh, the lemon and the freshness of the parsley -- second to none.
This is great on grilled foods, too.
It's very similar to a chimichurri.
So if you're looking for something a little different, this is a great sauce to make even if you're not making chicken thighs.
Alright.
So that looks great.
I've got a little bit of cleanup to do, and then the chicken should be ready.
♪♪ [ Sizzling ] That's looking good.
Alright.
So the temp I'm looking for is 160.
There we go -- 161.
Close enough.
The chicken is obviously not cooked through.
160 is not a safe temperature for chicken thighs, but we're not done yet.
I went ahead and preheated the broiler, because we're gonna finish these now skin side up.
And that hot pan really did a great job rendering that chicken skin.
It's just starting to color.
If some of the skin sticks, that's okay.
That's why I have a spatula.
There we go.
So now that the broiler is heated, I'm gonna put the chicken right on the top rack, closer to the broiler.
I'm gonna let this go for about another five minutes or until the thighs register 175.
♪♪ Ooh.
Nice and browned and super crisp.
It's about as good as it gets.
Just five minutes.
That's all it took for those skins to get nice and brown.
But you can see that they're charred, almost like chicharrones, on top.
Beautiful.
Let's make sure that they're registering 175.
Yep.
Just over 175.
That's perfect.
Alright.
So put these onto a platter here.
We're so close to the end, but we need to let this sit for five minutes while I clean up and go get the sauce.
Chicken thighs have rested.
It's time to finally eat.
Now, before I tuck in here, I just want you to hear how crisp this chicken skin is.
[ Tapping ] That is super crisp.
Alright.
So I'm gonna go for this one in the front here.
And a little bit of the salsa verde on the top.
Gorgeous.
You know, I love this salsa, so I'm gonna put some on the side too.
Alright.
So now I'm gonna tuck in right here.
Super juicy meat.
And the skin.
Look how paper-thin that is.
That is really well rendered.
Grab a little bit of that salsa there.
Mmm.
Amazing.
Chicken thighs are pretty rich.
It's great to serve it with a sauce just like this because it has some of that lemon and it's gonna break through some of that fat.
Gorgeous.
Look how juicy.
Oh.
Now I'm getting some of that crunch of that chicken skin.
It is unbelievable.
That might be the easiest way to cook chicken thighs, and they are delicious.
Now, the keys to making them at home -- poke the chicken skin, start them on a preheated sheet pan, and then finish them under the broiler.
So from "America's Test Kitchen" at home, the world's best oven-roasted chicken thighs.
♪♪ -I love winter cooking, when the kitchen gets all cozy, and it's warm, and the food smells as good as you know it's gonna taste.
Roasting rules in the winter, and here's some of our favorite items to roast it right.
For larger cuts of meat or birds, you're gonna need a proper roasting pan.
We tested a bunch of them.
This is our favorite one.
This is the Calphalon Contemporary stainless steel roasting pan with rack.
It proved really good at browning consistently and evenly, both in the oven and for stovetop searing.
It's got big, beefy handles that are easy to grip even with oven mitts, which, of course, you'll be wearing because it's gonna be hot.
And it also comes with this roasting rack, and that's the source of our only gripe.
The roasting rack actually slides around a little bit.
Some testers thought it could fit more snugly.
But that's a minor thing.
Don't worry too much about it.
Typically, this pan costs about $140.
Some people don't roast all that often and may want to spend a little bit less, so we actually have a best buy, also.
This is the Cuisinart Multiclad Pro stainless steel 16-inch roasting pan, also with a rack.
It did almost as well as the winner, and this one usually costs around $90.
The prices of both of these pans can vary, so we suggest checking before you decide which one you want to buy.
Now, truth to tell, a lot of the roasting that I do, I forget about a roasting pan altogether, because the items are smaller, like chicken parts or fish fillets or one of those multi-ingredient sheet-pan meals.
In that case, I will reach for one of these.
This is a rimmed baking sheet, aka half-sheet pan.
It measures about 13 inches by 18 inches, so it's plenty spacious.
The sides are usually about an inch tall.
And this is our favorite one.
This is the aluminum Nordic Ware baker's half sheet.
It's about $15.
It's really even-cooking.
It resists warping.
And in fact, the test kitchen has about 900 of these puppies.
So I will personally vouch for the fact that it stands up to punishing daily use.
Now, having the right pan is important, but it's not gonna ensure that you can't accidentally overcook whatever it is you're roasting.
For that, you are gonna need a probe thermometer.
It's got a couple of parts.
This is the temperature sensor that goes into the thickest part of whatever you're roasting.
You run that out the oven door, plug it into the receiver, which sits outside of the oven.
You program the finished temperature that you want to reach, and this will sound an alarm when the food's heated up to that temperature.
This is our favorite probe thermometer.
It's the ThermoWorks ChefAlarm.
It's about $59.
We loved it because it's accurate.
It's really easy and intuitive to use.
It can be calibrated.
This is really a secret weapon in the kitchen.
You will never overcook a roast again.
♪♪ -I grew up in upstate western New York, right on the Erie Canal and everybody had an apple tree in their yard, which means I've eaten my fair share of apple crumble.
And I have strong opinions on the topic.
So I'm excited to share with you my favorite version, which starts with a ton of apples.
This is 4 pounds of Golden Delicious apples.
And to me, good apple crumble has a thick layer of apples and just a hint of topping.
Now, Golden Delicious apples are perfect for crumble because they're available everywhere, they have a really nice, balanced sweet/tart flavor, and they hold their shape during baking.
If you can find Honeycrisp, those are my favorites, but they're seasonal and probably a little regional.
Braeburns are also another good substitute.
But whatever you do, don't use Granny Smith.
They will break down to mush.
Alright.
So I'm just gonna peel and core them.
Now, whenever I peel an apple, it's silly, but I try to get the peel off in one long piece.
Keep myself entertained while I peel apples.
That's not bad.
Let's see if I can do better.
And I still sing the alphabet whenever I twist off the stem, because when you grow up in apple country, whatever letter you land on and the stem releases from the apple, that is supposed to be the first initial of who your true love will be.
So that's all the apples.
Now we're simply going to cut around the core and cut them up into chunks that measure about 3/4 inch.
And you could use an apple corer here, but I don't like them very much.
I think they're hard to use and they miss some of the core.
Cutting around the core is just much faster.
Once you cut it around the core, you're just gonna break the pieces down into chunks, again, that measure about 3/4 inch.
And that is a lot of apples, which, to me, is really important for a good crumble.
We're just gonna flavor it with a few things.
This is two tablespoons of fresh lemon juice.
A little bit of sugar.
Not a lot.
I don't like really sweet crumbles.
I just want to taste the apples.
So we're only gonna add 2 tablespoons of sugar 1/2 teaspoon of table salt.
Last but not least, 3/4 teaspoon of cinnamon.
Right.
You want to stir this all up.
Mmm.
Already smells good.
Next we're gonna put these apples right in the baking pan.
And here, I have an 8x8-inch metal pan.
I know.
It's a small-looking pan, and it's a lot of apples.
But we're gonna pack them in there.
They look like they're overflowing the edges of the pan, and you're probably thinking, "Where are you gonna put that crumb topping?"
Well, I'm gonna cover this with foil.
I'm gonna parcook the apples so it's gonna reduce their volume till they fall just below the lip of the pan, giving us room for the topping.
And we're gonna put this on a rimmed baking sheet just in case some of those juices flow over the edges.
This is going into a 400-degree oven for about 30 minutes, until those apples fall just below the lip of the pan.
♪♪ Those apples have just a few more minutes in the oven, so it's the perfect time to make the topping.
Now, the topping, like I said before, I don't like a lot of it, and I care about the texture.
I like it crunchy and a little bit sweet but not overly sweet.
So we're gonna start with just a cup of flour.
This is all-purpose flour.
And, of course, you could measure it using a cup measure.
I like to weigh the flour.
It just is easier, and it's more consistent for me.
A cup of all-purpose flour should weigh 5 ounces.
To this, we're gonna add some brown sugar -- 1/2 cup of packed brown sugar.
I keep my brown sugar in a zipper-lock bag.
Oh!
If you have one of these -- it's a little brown-sugar keeper -- but it's terra-cotta -- a piece of terra-cotta -- that you soak in water, and it helps your brown sugar stay nice and moist for a long time.
This is light brown sugar.
I pack it into the cup, and I use the bag to help me really press it into the cup.
And then I rub the top to make sure it's flat.
And that's it -- 1/2 cup of brown sugar.
Now 1/2 cup of sliced almonds.
I'm gonna chop them pretty fine.
And you could use a food processor for this if you want.
Into the bowl with the flour.
Alright.
Just a few more ingredients.
2 teaspoons of vanilla extract.
1/2 teaspoon of table salt.
We're gonna add 2 teaspoons of water.
Now, I know it doesn't sound like a lot of water, but it makes a big difference in the topping, because it makes it have an extra-crisp texture.
Last but not least, we're gonna add butter.
This is 6 tablespoons of unsalted butter that I melted.
You could melt it in the microwave if you want.
I like to melt it on the stove.
I don't know why.
I tend to splatter it all over the microwave.
Now we're just gonna mix this together until it's evenly combined.
And you'll see it almost looks like a cookie dough.
Lots of little crumbles.
Perfect.
Everything is evenly combined.
Let's check those apples.
Mmm.
You can see they've really sunk below the lip of the pan, which is perfect.
Now I'm just gonna press on them slightly, really to compact them and make room for that topping.
Now we're just gonna sprinkle the topping right over the apples.
I'm gonna break up any clumps that are bigger than a marble.
Alright.
So I'm just evening out the topping on here.
Making sure it gets into the corners.
That looks good.
Back into the oven this goes, but this time I'm gonna put it on the upper rack.
That way, the heat is concentrated on the topping so it can get good and golden.
It'll take about 30 minutes for the topping to cook through and for the juices of the apples to bubble up around the sides.
♪♪ That crumble's been in the oven for about 30 minutes, and I can smell that it's done.
Oh!
Look at that beauty.
Thank goodness I put it on the tray, right?
A little bit of those juices overflowed the sides.
You can see that the topping is nicely even golden, and the juices have bubbled up around the edges, which is perfect.
Now, these apples really need to cool for at least 45 minutes before you dig in -- not only so you won't burn your mouth, but so that the apples actually set up and it's scoopable.
So, hard as it may be, the key to a really good apple crumble is patience.
Here's why.
As the apples heat through during baking, their cells undergo some changes.
Apple cells contain water and are held together by pectin molecules.
As the heat from the oven penetrates the apples, it forces the water through the cell walls.
The pectin then dissolves into the water, allowing the cells to separate, and forms a delicate mesh.
The key, then, is to understand how this loose mesh of pectin changes as the crumble cools.
If we scoop into the crumble when it's fresh out of the oven, all that water will flow out because the pectin mesh is loose and mobile while it's hot.
As the crumble cools, however, this pectin mesh changes.
It becomes tighter and less mobile and ultimately sets the water into a firm gel.
And that's why when we scoop into the cooled crumble, the filling isn't watery, but rather has a thickened texture that stays put.
So don't let that 45-minute cooling time get the better of you.
Just let it rest.
The crumble has been resting for 45 minutes, so now we can dig in.
[ Tapping ] That's a good sound.
Right through that crisp topping.
Mmm.
Lots of apples.
Mm-mm-mmm.
And, of course, I'm gonna serve this with a little vanilla ice cream.
Just a little.
[ Laughs ] This is an upstate New York portion right here.
Mmm.
You can see my portion of apples to the portion of topping is the right ratio for me.
I like nicely baked apples with just a little bit of that crisp topping.
The topping has a really rich flavor, but it's not greasy.
And you can see, thanks to that 45-minute resting time, it's not really soupy in the bottom.
That apple filling has really set up.
Yep.
That is a Monroe County crumble, alright.
If you want to make the ultimate apple crumble, you got to remember three things.
First, use a lot of apples -- a whopping four pounds.
Second, you want to make sure you cook those apples in the pan before you add the topping.
Last but not least, have a little patience during the cooling time so the filling can set up.
From "America's Test Kitchen" at home, the last word on apple crumble.
-Thanks for watching.
You can get all the recipes and product reviews from this season and more on our website.
That's americastestkitchen.com/TV.


Support for PBS provided by:
America's Test Kitchen is presented by your local public television station.
Distributed nationally by American Public Television